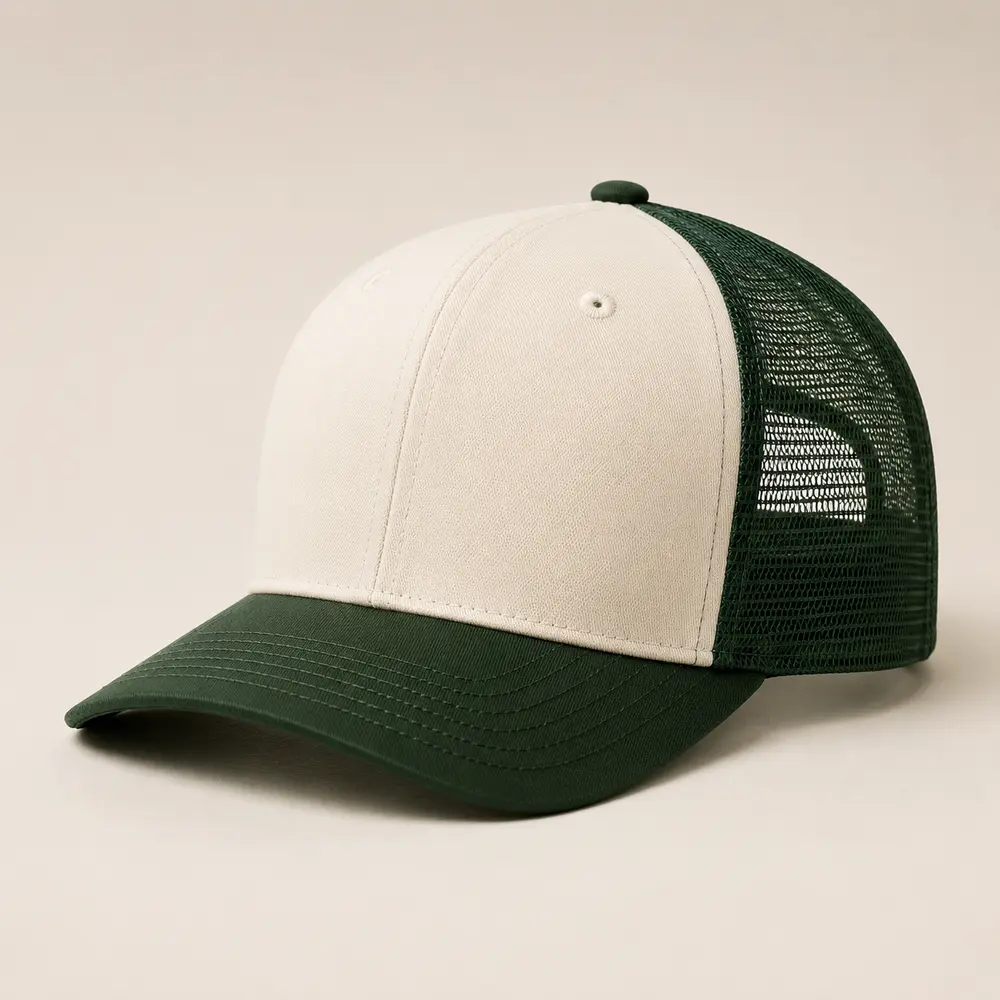
A sandwich visor adds a visible contrast layer between the top and underside of a cap brim. It can strengthen a club or brand color story, but “add a contrast sandwich” is not a production-ready instruction. Buyers must specify which layer is visible, where the contrast begins and ends, how the edge is finished, and how the complete visor works with the crown, logo and final curve.
This guide helps brands, clubs, distributors and merchandise buyers prepare a quote-ready sandwich visor brief and approve the physical cap sample before bulk production.
Quick Answer: What Must a Buyer Approve?
Approve the complete visor on the selected cap. Record:
- Cap style, crown profile and visor shape
- Sandwich visor construction proposed by the supplier
- Exposed edge position and visible depth
- Top, contrast layer and underbrim color references
- Continuous or segmented color route
- Visor thickness, stiffness and final curve
- Start, stop and corner finishing
- Stitch rows and distance from the edge
- Logo, piping and decoration clearance
- Inside finish and wearer-facing underside
- Approved physical sample and specification version
- Bulk inspection and change-control rules
A flat digital mock-up can show a colored line. It cannot prove the visible depth, edge smoothness, layer alignment, brim stiffness, curve or final color on real materials.
1. Confirm the Cap and Visor Before the Contrast Layer
A sandwich visor is part of the brim construction. A structured baseball cap, trucker cap, snapback and soft unstructured cap can use different visor shapes, thicknesses and curves. Confirm the chosen cap and whether the brim is flat, pre-curved or intended to be shaped later.
Record the crown-to-visor relationship, finished brim width, center line and wearer-left and wearer-right sides. Do not transfer an approved edge construction to another cap without checking its pattern and materials.
2. Define What “Sandwich Visor” Means for This Project
The visible contrast may come from a separate material layer, an inserted edge strip or another supplier-confirmed construction. Ask the supplier to identify the proposed build instead of approving only the visual term.
Record:
- Supplier construction reference
- Materials used for the top, visible edge and underside
- Whether the visible line is continuous
- Finished exposed depth
- Edge finishing method
- Join, start and stop positions
- Approved sample reference
Do not infer fiber content, recycled content, water resistance or durability from the appearance of the edge.
3. Specify the Visible Edge Depth
The same color can look subtle or dominant depending on how much of the contrast layer is exposed. Define the visible edge by a measurable sample reference or agreed range, not only by “thin” or “bold.”
Measure the finished feature after the visor is assembled. Raw material thickness and the visible profile are not necessarily the same. Compare the center front, side curves and both ends because a line that is even at the center can narrow or widen near the corners.
Avoid a universal standard
There is no single correct sandwich depth for every visor. Fabric thickness, insert construction, brim stiffness and desired visual weight all affect the result.
4. Create a Complete Visor Color Map
Specify the color of every visible surface separately:
- Visor top
- Exposed sandwich edge
- Underbrim
- Stitching
- Piping, if used
- Crown panels
- Button, eyelets and closure
- Front and side decoration
A color name such as navy or red is not enough for close matching. Give an agreed color reference and approve the real materials together. Cotton twill, polyester, thread, mesh and an edge layer can reflect light differently even when they use a related reference.
For broader color planning, review Pantone Color Matching for Custom Hats: A B2B Buyer’s Approval Guide.
5. Mark the Start, Stop and Corner Route
State whether the contrast line runs around the full exposed visor edge or stops at defined points. Mark wearer-left and wearer-right views and show how the layer finishes near the crown attachment.
Inspect:
- Symmetry between both sides
- Clean start and stop points
- No exposed raw edges
- No color gaps at joins
- Smooth transition through curves
- No unexpected layer showing near the crown
- Consistent visible depth at both corners
Close-up photos of the approved sample should become part of the production reference.
6. Coordinate Stitch Rows with the Edge
Visor stitch rows can emphasize or compete with the sandwich line. Record stitch count or spacing only when confirmed for the selected construction, and approve thread color separately.
Check that stitch rows remain even and follow the visor outline. The sewing should not pull the visible layer upward, create ripples or expose an uneven edge. If a contrast stitch is required, view it at normal distance as part of the complete color composition.
7. Approve Flat or Curved Brim Behavior
A sandwich line can change appearance when a flat visor is curved. Approve the visor in the final intended shape, not only before shaping.
Check:
- Center curve and side symmetry
- Edge smoothness after bending
- Layer separation or rippling
- Changes in visible depth
- Corner distortion
- Relationship to the crown and front logo
Do not promise that the same brim will hold one exact curve for every wearer or use. Approve a practical physical reference and the construction method.
8. Keep Decoration Clear of the Visor Edge
Front embroidery, patches, visor embroidery, underbrim printing and piping can affect the sandwich construction or make the design visually crowded. Approve all visible elements together.
For a crown logo, confirm the finished size and placement relative to the visor. For visor decoration, mark the distance from the exposed edge and stitch rows. If underbrim artwork is used, review Custom Cap Underbrim Printing: Artwork, Placement and Sample Approval Guide and ensure important artwork stays clear of seams and the edge finish.
9. Inspect the Underbrim and Inside Finish
Turn the cap over. Confirm the underbrim color, edge alignment, seam or fold quality and the transition into the crown. Check for loose threads, uneven layers, hard points, adhesive marks or color contamination.
The underbrim can be a separate color decision. A contrast sandwich does not automatically mean a matching underbrim, so state the intended relationship explicitly.
10. Physical Sample Approval Checklist
- Confirm cap style, crown profile and visor shape
- Confirm flat, pre-curved or final curve direction
- Identify the sandwich construction and materials
- Measure the visible edge at center, sides and ends
- Approve visor top, edge and underbrim colors
- Inspect symmetry and the complete edge route
- Check start, stop, joins and corner finishing
- Review stitch rows and thread color
- Confirm clearance from logos, piping and underbrim artwork
- Shape or wear the cap as intended
- Inspect the underside and wearer-facing finish
- Photograph front, side, underside and close-up views
- Save the approved physical sample and specification version
- Require reapproval if the cap, visor, color or construction changes
11. Bulk Production and Quality Control
Use the approved sample as the visual and construction reference. Representative bulk checks should confirm:
- Correct cap and colorway
- Correct sandwich construction
- Consistent visible edge depth
- Smooth curves and corners
- Symmetrical start and stop points
- Correct top, edge, underbrim and thread colors
- Even visor stitching
- No layer separation, fraying or exposed raw edge
- Correct logo and decoration clearance
- Clean underside and inside finishing
- Correct labels, packing and SKU identification
Agree the inspection method before production. A new visual standard should not be introduced after the order is complete.
12. MOQ, Sampling and Quotation Conditions
For regular baseball, trucker and snapback caps, the established LOSTCAPS baseline starts from 50 pieces per color and design when the selected cap, sandwich construction and decoration are feasible. Different colors or designs should not be combined to reach one 50-piece minimum.
A custom-dyed edge material, new visor construction, special stiffness, unusual color combination, labels or packaging can change the practical minimum, setup and price. Confirm conditions for the exact specification.
A physical cap sample is generally planned at 7–10 days after the cap, artwork, colors, visor construction and payment are confirmed. This is a planning baseline, not a fixed promise for every special brim. Production and shipping time are separate.
Ask the quotation to separate the cap base, sandwich visor construction, decoration, labels, packing, sample or setup, freight and delivery term.
Quote-Ready Sandwich Visor Brief
Send:
- Cap style, crown profile and visor direction
- Reference photos with the edge line annotated
- Top, edge and underbrim color references
- Preferred visible edge depth
- Logo artwork, dimensions and placement
- Quantity per color and design
- Labels, hangtags and packing requirements
- Delivery country and target date
- Person responsible for sample approval
Compare regular cap styles at custom baseball cap manufacturing, review customization options at customization options, or send the full brief through request a custom headwear quote.
FAQ
What is a sandwich visor on a cap?
It is a visor construction with a visible contrast layer or edge between the top and underside. The exact build must be confirmed with the supplier.
How wide should the visible color edge be?
There is no universal width. Approve the visible depth on the actual visor because materials, thickness, curve and design intent affect the result.
Can the sandwich edge match a Pantone color exactly?
A requested reference can guide color development, but materials and curved surfaces can look different. Approve the real edge beside the crown, underbrim and decoration.
Can any cap use a sandwich visor?
Not automatically. The visor pattern, thickness, edge construction, curve and sewing access must be checked for the selected cap.
What MOQ applies?
Regular baseball, trucker and snapback projects generally start from 50 pieces per color and design when the chosen construction is feasible. Special colors or a new visor build may require a higher project-specific minimum.
Is a physical sample necessary?
Yes. The sample is needed to judge the edge depth, symmetry, curve, layer alignment, colors, stitching, logo clearance and underside finish.